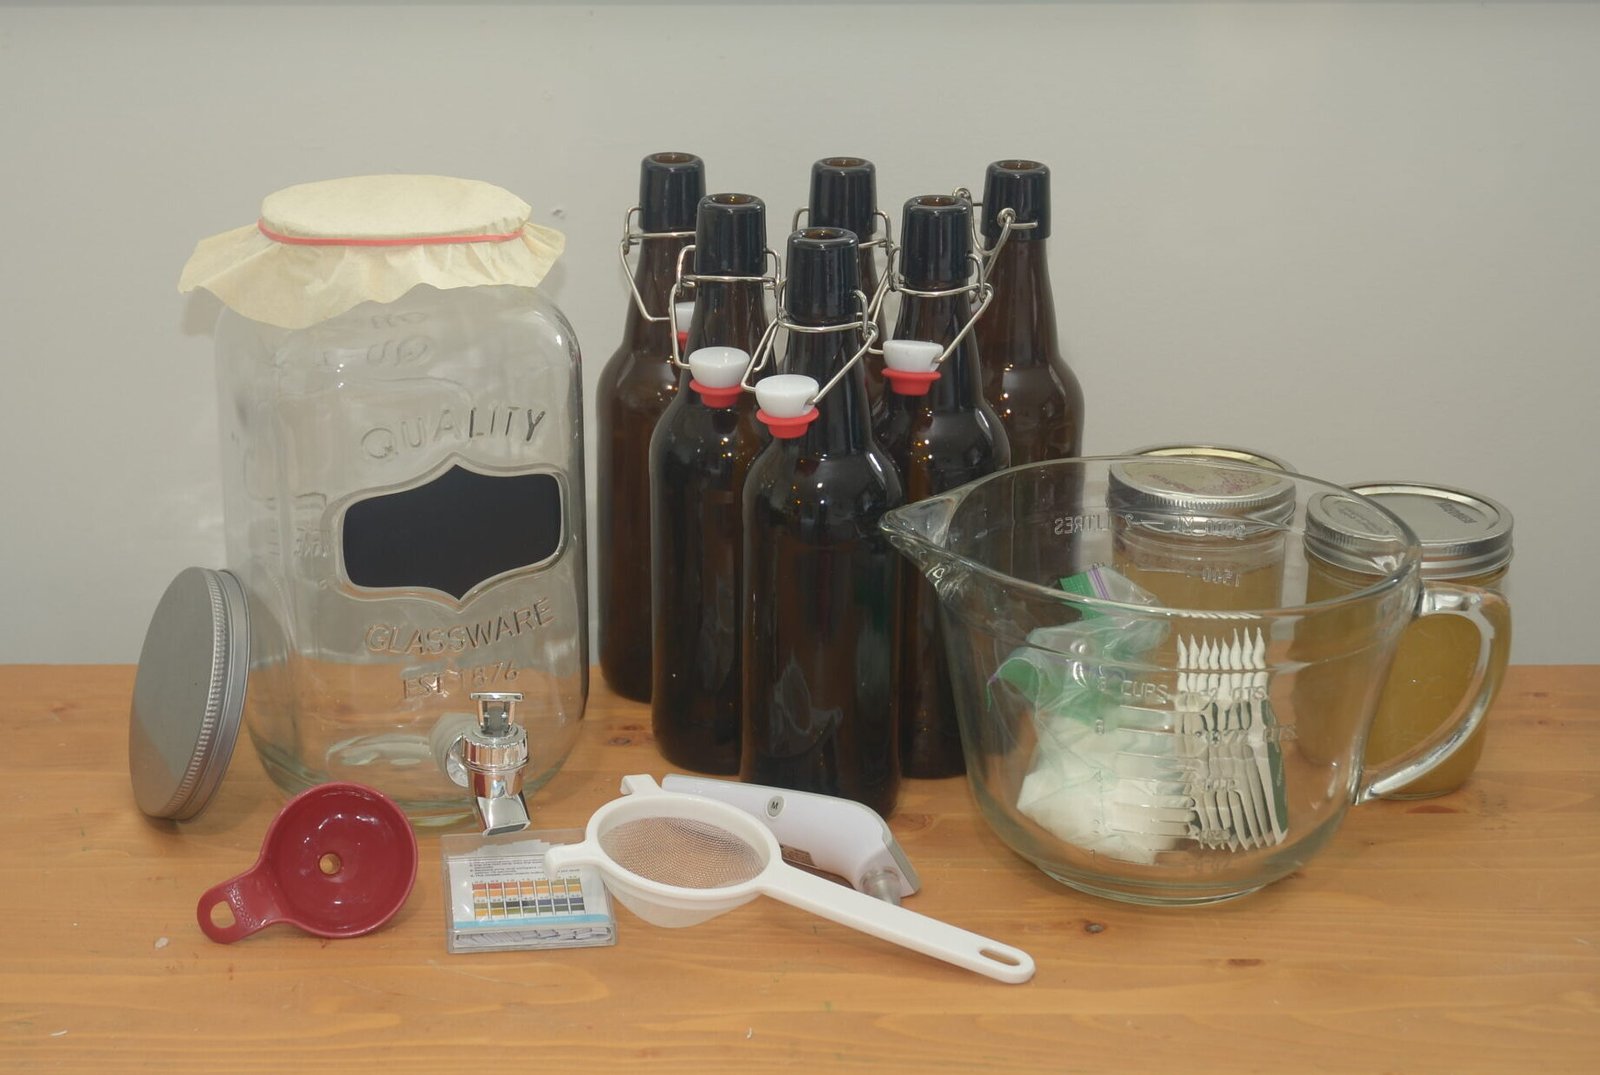
Brewing your own kombucha really is a breeze…as long as you know what you’re doing.
Summary
Step 1: Steep 3.5L of sweet tea (8 tea bags, 1 cup of sugar)
Step 2: Add the starter (0.5L; after the tea cools)
Step 3: Ferment aerobically at room temperature for 4-7 days (out of UV light)
Step 4: Bottle your kombucha with juice (370mL kombucha to 80mL juice)
Step 5: Ferment anaerobically for 3-4 days (out of UV light)
Then move your bottles to the fridge to reduce the temperature to below 10 degrees C to deactivate the bacteria and yeast. Consume within a few weeks (unless you’ve done a very thorough sanitization before bottling).
Here’s a video of just the first phase:
Step 1: Steep 3.5L of sweeeet tea
Black tea, green tea, white tea–it all works. (That said, we’ve tried Early Grey and although it can work well, it didn’t work so well for us.)
In a heat-resistant vessel (not the fermentation vessel supplied by us), brew 3.5L of tea. We typically use 8 tea bags.
Add 1 cup of sugar to the 3.5L. (Pro tip: we divide our tea into two batches because we don’t have a heat-resistant vessel large enough for the full 3.5L. We also divide the sugar into two batches, so a half-cup each.)
Allow it to cool to 30 degrees Celsius (or cooler).
Step 2: Add the starter
You don’t need a SCOBY “mother” for this. We repeat: you do not need a SCOBY mother (aka “cellulose pellicle”) for this. But you do need some starter, like the kombucha we provide. (This Reddit thread is pretty insightful.)
Once the sweet tea has cooled to 30 degrees Celsius or below, transfer it to the fermentation vessel we provide.
Add 0.5L of the starter to the tea that is now in the fermentation vessel (because it has cooled).
(Heat will kill the bacteria and yeast, which are your friends. Do not expose them to hot tea or boiling water, or they will never forgive you. Same for the fermentation vessel: if you add boiling tea directly, the bottom will fall right out. Here’s more info on temperature.)
Put the air-permeable hat (it looks a lot like a coffee filter, because that’s exactly what it is) on the vessel, and secure it with a high-tech rubber band.
Step 3: Ferment aerobically for 4-7 days
Place the fermentation vessel out of contact with the sun (UV will kill the bacteria and yeast, which, you’ll recall, are your friends) and keep it within 10 to 30 degrees Celsius. Cover the fermentation vessel with something porous (like a coffee filter) to keep dust and fruit flies out, but allow oxygen in.
If you think of it, use a wooden or plastic spoon to stir your brew once or twice a day. (And if you forget, no worries. But the bacteria and yeast do like oxygen.)
After a few days, begin sampling your brew. Once it is sour enough for your liking, (and before it tastes like vinegar…unless you’re one of those people), declare the first fermentation complete. Pat yourself on the back. Usually this is 5 days, but it might take less time in the summer.
Step 4: Bottle your kombucha
Now you have an important decision to make: will you go for a second fermentation and take your kombucha to the next level, or will you stick with just one fermentation? Let’s assume you go for the second fermentation, because otherwise you’re just missing out.
Pour about 500mL of the kombucha you’ve just brewed into a sanitized jar to save for the next batch.
Sanitize your flip-top bottles (boiling water will do the trick; so will StarSan or similar).
Add about 370mL of the kombucha you’ve just brewed to a sterile flip-top bottle. (If using a Premium kit with a spigot, you won’t need a funnel. Otherwise, use a funnel.)
Add about 80mL of fruit juice or “second fermentation syrup” to the same bottle. (This likely requires a funnel.)
Using care not to contaminate the bottle (ie. don’t touch the sealing surface of the bottle), seal the lid.
Repeat until the fermentation vessel is empty. Add the dregs from the fermentation vessel to the jar of brew you’re saving for the next batch (these dregs are ridiculously rich in bacteria and yeast).
Step 5: Ferment anaerobically for 3 days
Now let it sit for 3 days in the dark (well, out of direct UV). We’ve waited 4 days and it has worked out great. Five days might put you into a danger zone of over-carbonation, which makes for a mess, and possibly alcoholization. (Some folks even suggest up to 14 days, but that requires burping and can get complicated, and that will lead to higher alcohol content.)
We’ve heard of people doing the second fermentation so long that the bottle exploded! So using a container like a cooler for the second fermentation is a good idea.
Step 6: Chill and enjoy. While chilling.
After the 3-(or 4-)day anaerobic fermentation period, get the temperature below 10 degrees Celsius so the bacteria and yeast can go to sleep.
Crack a lid (pfffsst) and sip your deliciousness (aaaahh!).
(The bacteria and yeast will wake up once they’re in your gut for a probiotic health transformation!)
Step 7: Prepare your next batch
We do this concurrently with Step 5 actually, but whatever. Clean out your fermentation vessel and head right back to Step 1.

